Burning a candle sounds like a simple business: you simply light up the wick and enjoy the warmth and smell of it. Unfortunately, there’s also a couple of things that can go wrong when lighting up a scented candle: it can go off, smell weird, and burn unevenly.
When a ring of hard, unmelted wax forms around the outside of your candle, this is known as “tunneling”. Only part of the wax gets melted, and the rest is lost. There’s a couple of reasons why your candle may be tunneling: you may not be lighting it up for proper amounts of time, the environment it is placed in may be unstable, or you may not have chosen the right wick for your candle. Whatever the problem is, you can remedy it at home with solutions like a candle topper or warmer.
In this guide, we’ve researched everything you need to know about tunneling—so you never have to deal with it again!

In this article, we’ll take a close look at tunneling, explaining what it looks like and why you should try to avoid it.
In the second part, we’ll look at some common reasons behind tunneling: improper use, bad candle design and improper flow of air in the room.
In the third part, we’ll look at the thing you can do to prevent your candle from tunneling.
Then, in the fourth part, we’ll explore how you can fix a tunneling candle easily, and with materials, you can find in your home. Finally, we’ll devote the last section of this article to extra tips on burning a candle properly—so you can get the right to burn every single time!
What Is Candle Tunneling?
First, let us look at what candle tunneling is. When you burn a candle, the flame from the wick heats up the wax of the candle, which begins to melt. Little by little, the total circumference of your candle should be fully melted, meaning that there is no hard wax left. Well, that is, unless you are dealing with tunneling.
Tunneling happens when a ring of wax seems to refuse to melt. Overtime, this wax collects on the edge of your candle, and becomes unusable. Eventually, what you’ll see is a candle which seems to have a hole where the wick is. This can happen with every type of candle, from round jar candles to pillars, votives, and even tea lights.
You’ve probably witnessed a tunneling candle before. In fact, it is quite a common problem that most candle-lovers have to deal with at some point. While some think that it’s a normal part of the candle experience, it is actually a result of improper use and can be remedied relatively easily.
There are a couple of reasons to want to avoid tunneling.
First of all, it is simply wasteful. The wax that goes unmelted in your candle costs you hours of candle time. When dealing with large or expensive candles, this means quite a lot of money lost.
Secondly, a tunneling candle looks unappealing and awkward.
Finally, when dealing with a scented candle, one that is tunneling will produce a weaker smell. This is because less of the wax is melting, meaning that less fragrance is being released into the room. For all these reasons, it is important to avoid candle tunneling.

*Photo above: The candle on the left is tunneling – you can see the flame below level of the wax. The candle on the right is burning evenly and completely with no residual wax.
*Source: scentsnob.com
So why is tunneling happening, and what can you do to avoid it? Let’s find out!
Why Is My Candle Tunneling?
So you’ve got your candle, you’ve lit it up the normal way but instead of behaving normally, it forms an odd tunnel around the sides. Even though it may be easy to blame it on the candle manufacturer, the truth is that most candles these days are checked carefully for quality, and won’t tunnel on their own.
Now, that is not to say that this is entirely your fault. There are also elements in the environment that can make a candle more prone to tunneling. Let’s have a closer look at the most common reasons for that strange effect:
You’re not burning your candle correctly on the first burn.
By far the most common reason for a candle tunnel is not lighting it properly on the first burn. When you get a new candle, the first time that you light it up is actually the most important: it will determine the quality of the burn for all the subsequent times. So when you get ready to light up your new candle for the first time, be very careful.
First, you should have at least a few hours ahead of you. This is because fully melting the wax on the surface of a candle takes longer the first time around. With a smaller diameter candle, you can expect the wax to burn completely in 2 to 3 hours. But with a larger candle, especially one that doesn’t have multiple wicks, you’d be advised to wait at least 4 hours, or until all the wax has melted completely, before you put it out again.
If you leave your candle on for just an hour, you will only melt part of the wax. The area of wax that remains unmelted this time around will also remain unmelted the second time around, and all the subsequent times. This is why getting a nice, total burn on the whole area of the candle on the first burn is so important.
You’re not burning it all the way through
So let’s say you’ve burned your candle properly the first time. You’ve let it have quite a few hours of burn time, and the wax melted fully on the whole surface of the candle before you put it out. Now, can you leave it on for less time the second time around?
In general, yes, your second burn shouldn’t have to be nearly as long as your first burn. In fact, it isn’t advised to let your candle burn for more than 4 hours the second or third time that you use it. Nevertheless, the same rule applies: you should let your candle burn until the whole surface area of it is melted! If you only leave your candle to burn for a half-hour, you won’t be burning all the wax to the edge, resulting in a tunneling effect the next time that you use it.
So remember: a candle should always be burned until all the wax is melted on all sides. Anything less than that will almost inevitably result in a very unsightly tunneling effect.
Environmental factors
Let’s face it, when a candle starts tunneling, it is due to an incorrect understanding of burning times by the person who lit it up. In some cases however, the environment can come into play as well. For example, placing your candle at an incline can melt it burn improperly.
When the table or window sill on which you decide to place your candle is not even, the wax will melt to one side of the candle more than the other. As a result, it may be impossible to burn one side of your candle, resulting in a kind of slanted tunnel effect. To avoid that, make sure that your candle is always placed on a straight, even platform.
Another possible cause of tunneling is improper airflow. Candles burn best indoors, when there isn’t any wind or air flowing which disturbs the burning of the flame. If you place your candle outdoors, or in a drafty room, you may find that it burns unevenly, sometimes resulting in a tunneling effect. If this is the case, make sure to place your candle in a protective candle holder, or bring it back inside.
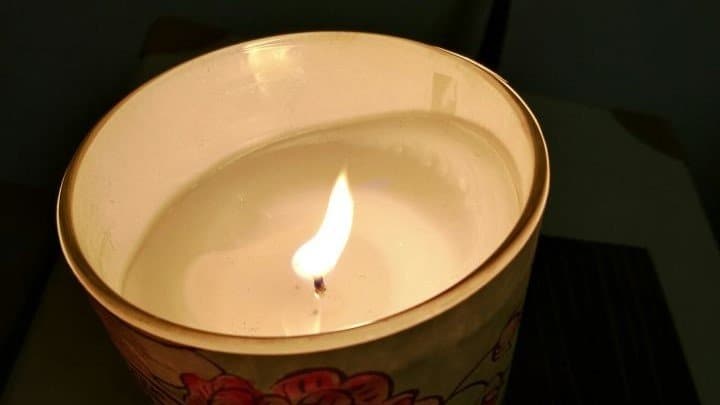
Wrong wick number
This is not the most likely reason behind a tunneling candle, but the wick number may be affecting its burning, too. The wick number of a candle is essentially the thickness of the wick.
A smaller candle requires a smaller wick, a larger one requires a thicker one. When manufacturers make candles, they are careful to use the proper wick size for the diameter of the candle. The problem may arise if you make candles yourself, or buy them from an amateur candle-maker.
If you or the person making the candle has calculated the wrong wick number, you may end up with a candle that simply cannot be burned to the edge, resulting in a tunneling effect. If you are making your own candles, remember always to check the diameter of your jar, and to select the appropriate wick. For a larger candle, you may even have to go with several wicks.
Now that we’ve looked at why candles tunnel, let’s find out the easy solutions we can put into place to avoid this:
How To Prevent My Candle Tunneling?
Understanding what creates tunneling in a candle should give you all the tools you need to prevent the tunneling effect. Simply try to avoid the conditions that can create a tunnel! To sum these up, they are: lighting the candle improperly, not letting it burn long enough, placing it in the wrong environment or in a draft space.
Light it up properly on the first burn
Our first tip is simply to light your candle up for a long time on the first burn. And by a long time, we mean a LONG time. It could be 4 hours until the total area of your candle has melted, it could also be 6. This is why it might be a good idea to light your candle up the first time in the morning or in the afternoon: it allows you to have a few hours to burn it, before you go to sleep.
If you choose to light up your candle in the evening, you may find that it doesn’t have time to melt all the way through before you go to sleep, which will create a tunneling effect. Try to make a little ritual out of it: all new candles will be burned in the mornings or early afternoons and monitored closely until all of the wax has melted properly.
INITIAL BURN TIMES BY CANDLE WIDTH
[su_table]
| CANDLE WIDTH | INITIAL BURN TIME |
| 1inch / 2.5cm | 1 hour |
| 2inch / 5cm | 2 hours |
| 3inch / 7.5cm | 3 hours |
| 4inch / 10cm | 4 hours |
| 5inch / 12.5cm | 5 hours |
| 6inch / 15cm | 6 hours |
[/su_table]
*This is just a rough guide, it’s best to burn the candle for as long as it takes for the melted wax pool to reach the outer edge.
*source: osmology.co
Let it burn for long enough periods of time
After the first burn, don’t be tempted to think you don’t need to check up on how the wax in your candle is melting. Even though your second and third burn times will be shorter, the wax should still be melted all the way through. With a scented candle, it can be easy to assume that just because the scent has been released you don’t need to keep it on longer.
But if the wax hasn’t melted fully yet, it is imperative that you leave it on for longer. This isn’t wasteful. In fact, quite the opposite. It is the only way to avoid a tunneling effect in your candle, which would end up wasting quite a lot more wax.
Place your candle on a flat surface
If you consistently notice that your candle is burning more on one side than on the other, it could be due to one of two things. Either your wick is off-center, which you can’t do much about at this point, or your candle isn’t placed on a flat surface. If you think that this may be the case, try to change where you put your candle.
A countertop or steady table may be your best bet. And if the tunneling is happening because your wick is off-center, you may want to change the candle company you are buying from!
Keep your candles away from the wind
Wind isn’t the most common reason for candles to the tunnel, but if your room is constantly drafty or if your candle sits out on your front porch, problems in the airflow may be causing the flame not to burn straight, and to melt more wax on one side or another. To remedy this, place your candle indoors, and try to keep it away from any drafts: they have never made a candle burn better!
Now you know how to avoid tunneling, you’ll have a definite advantage the next time that you decide to burn a candle. But in the meantime, what can you do to remedy your tunneling candles? Let’s have a look at our options!
How To Fix A Tunneling Candle?
To fix a tunneling candle, you’ve got a couple of options. In general, what you want to do is to create additional heat, which will melt the hard part of the wax that is creating the tunnel. To do that, you can use some of the following methods:
Use aluminum foil
The simplest way to reset your candle to get rid of its tunnel is wrap it up in a little dome of foil. To do that, take a strip of foil, and wrap it up so that it goes all the way around the candle and over the jar, leaving only a small opening on top for the flame (after all, you still need oxygen to burn your candle properly!).
The aluminum foil will reflect the heat from the flame, making it more powerful. As a result, more of the wax will burn, even those hard bits that the flame couldn’t seem to reach before.
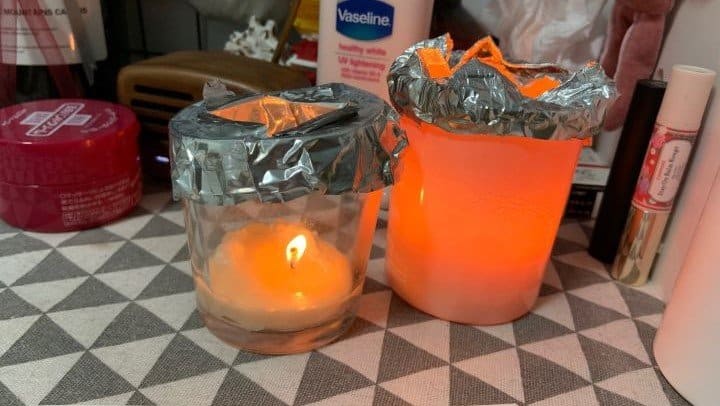
This technique is very effective and should only take a few minutes and up to half an hour. Monitor your candle closely, and remove the aluminum foil as soon as the entirety of the wax is melted. Unfortunately, this technique works better with candles that haven’t tunneled very far down yet. The longer you leave tunneling to go on for, the harder it becomes to fix the problem.
If you are dealing with a very big tunnel, using the aluminum method might make too much of the wax melt at once, which could “drown out” the flame, causing your candle to go off. So we recommend using this aluminum method only with candles that haven’t experienced too much tunneling yet.
Use a candle topper
If you are dealing with tunneling frequently or if you just don’t enjoy using single-use aluminum to remedy your tunneling problems, then a candle topper may be perfect for you. In essence, a candle topper is a lid that you can fix on a candle jar to keep it warmer. Like aluminum foil, it reflects heat, creating more warmth for the wax in your candle to melt fully.
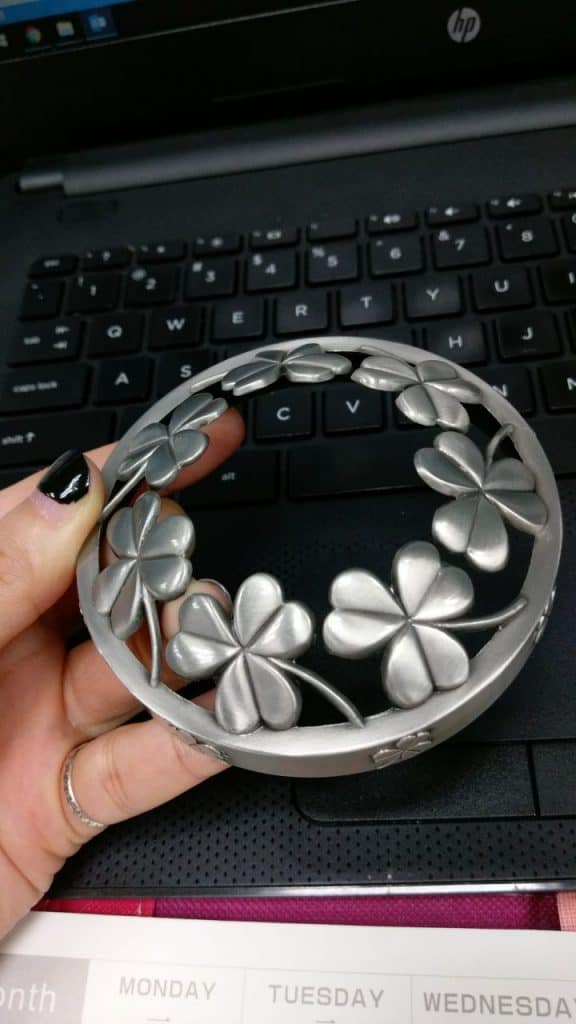
These ones are not made of aluminum but simply of metal, and you’ll be able to use them again and again on any candle of your choice, provided they are the right diameter. And the best thing about them? Candle toppers can be really pretty! From star pattern to snowflakes or hearts, you can find candle topper with beautiful and intricate designs that’ll make you smile whenever you use them.
Use an oil burner
An oil burner is not meant to be used on a burning candle. Rather, it’s what you can use to get the most out of the wax that has tunneled in your candle jar, and that you weren’t able to use. While a candle topper or aluminum foil can be used to remedy a tunnel that is only just beginning to form, an oil burner is perfect for those more desperate situations.
When your tunnel has reached the end and there is no more wick to burn the wax with, you can use the oil burner to burn the wax, releasing its scent.
Of course, an oil burner isn’t much use if you are using an unscented candle, and you would do better to just keep the wax to make your own.
To use an oil burner, simply light up a tea light below the burner. Then, place the wax from your candle on the recipient placed above. As the flame of the tea light heats up the wax, it will finally melt, and release its scent into the air.
The only problem is that getting the tunneling wax out of your jar and into the burner can be a bit tricky. You could use either of two methods. The first one is to get the wax out of the jar manually, with a knife for example. This could be easy if your candle is made out of a soft, oily wax. If this proves too hard, then get the wax out of your candle by pouring boiling water on top of it. The heat will make the candle wax dissolve and float up to the top. When the water has cooled down, you’ll be able to collect the wax that has collected on top of your jar, and place it on your oil burner to enjoy a few more hours of candle scent!
Use a candle warmer
A candle warmer is a lesser-known device—but it can be really effective! It is essentially a lamp that is placed right on top of your candle and melts its wax evenly all the way across.
A candle warmer works great for wick-less candles, and is perfect for all those who want to avoid an open flame in their homes. To use a candle warmer, simply plug in the candle warmer lamp and turn it on. Place a candle of the appropriate diameter, and wait for the wax to melt evenly.
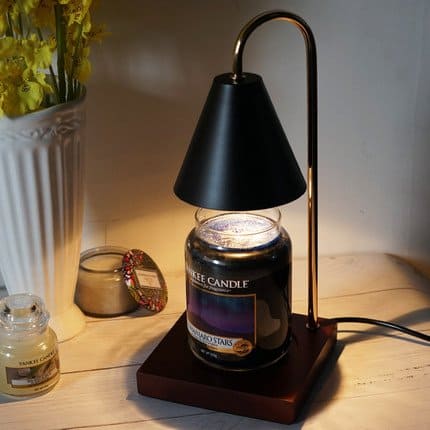
Because the light doesn’t come from a single point, as when you have a flame, the candle won’t tunnel.
So whether you want to use them as an alternative to burning candles, or simply to remedy tunneling, a candle warmer is a great device that has proved popular with countless candle lovers.
How To Burn The Perfect Candle Every Time?
Now that we’ve looked into the roots of tunneling, how to avoid it and how to remedy it, you’re starting to be a bit of a candle expert. So all that remains to do is teach you a bit on how to burn the perfect candle. This is a bit of art, and a bit of science, and it’s the knowledge that can go a long way for anyone passionate about candles!
The first step to burning a perfect candle is to maintain your candles properly. Candles that are in jars should be closed in between uses. Every single time. This is because candles can actually lose quite a bit of their scent if you are not placing them in air-tight containers.
The second step is to trim the wick of your candle. A long wick will burn stronger, create smoke and soot, and can end up wasting you a lot of candle time. You should be trimming your wick down to about 1/8 of an inch or about 3 millimeters before every use. Use scissors, nail clippers, even a wick trimmer but no matter what, remember to trim that wick!
Next, light up your candle and let it burn. This cannot be emphasized enough. A candle needs time, so give it time. On the first burn, give it at least 3 hours for the wax to melt fully all the way across. Subsequent times, make sure that your candle is burning to the edge before putting it out. This is the number one rule that you need to follow to avoid funneling.
Where you place your candle matters as well, so make sure that you are choosing a draft-free room where your candle won’t burn unevenly. Place it on a level surface, and, if possible, not too close to a wall. Candles can produce soot and having them in close proximity to anything can damage your walls, decorations, even carpets. So watch carefully where you place your candle; the center of a table may be best.
Finally, put out your candle with a candle snuffer if possible. Blowing on your candle will create smoke, which not only smells bad but can also be toxic. So extinguish your candle by stopping air from feeding the flame: with a snuffer or by placing something on top of your candle.
And this is it, everything you need to know about burning the perfect candle—every single time!
Summary
So we’ve learned what tunneling is, and what it looks like. It is essentially just the effect of what happens when the candle wax doesn’t burn right to the edge of a candle. This can be a result of a number of things, the most common cause is not leaving a candle to burn for long enough.
To prevent a candle from tunneling, you’ll want to watch its environment, its wick number, and more importantly, increase its burn time. Luckily, once the harm is done, you can remedy tunneling with a few different methods, from using aluminum foil to a candle topper, a candle lamp or an oil burner.
Tunneling is annoying, but luckily it is easy to avoid and fix. Just remember: it is not unavoidable, and it is not the manufacturer’s fault. So learn to avoid the most common pitfalls, and you can keep your candles tunnel-free and keep them burning perfectly for hours on end!

