Reed diffuser systems are extremely popular these days, and with good reason. This is not only a great way to spread great scents around your home and, therefore, give it some additional ambiance, but getting one of these systems set up is always a breeze.
In fact, the system is so easy to set up that you can even make your own diffusers if you like, making this a great hobby to have for all types of people.
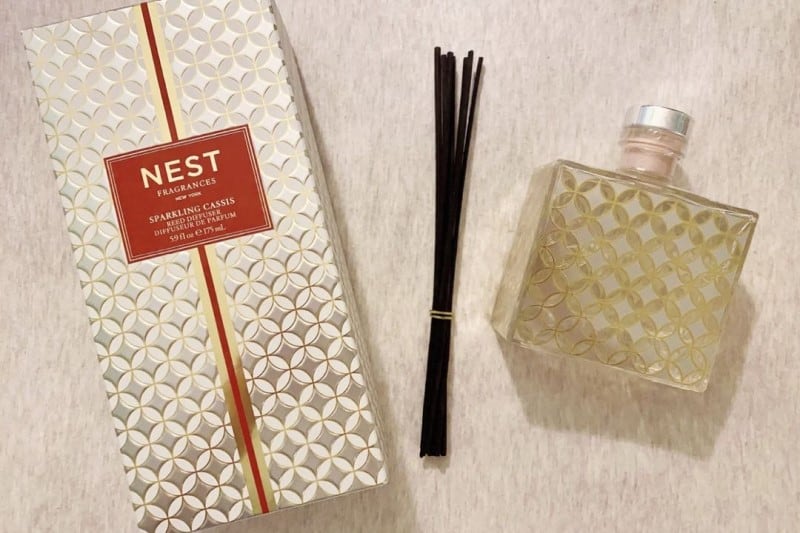
The first item you’ll need when you wish to make a reed diffuser set in the bottle for the reeds to sit in, and you can use bottles of all sizes, designs, colors, and shapes.
Reed diffuser bottles come with or without a top, so if you’re wondering how you open the bottle without damaging it, the answer is simple.
Most diffuser bottles that come closed are closed with either a cork, which is the most common, or a screw-on top. Corks can be difficult to remove, but they aren’t impossible. Even if the cork is broken when you get it, you can easily get the bottle open once you learn a few simple tricks.
What If the Cork Is Broken or Won’t Come Out Easily?
Sometimes, people order bottles that they plan to use as a reed diffuser, and when this happens, you never know for sure what the bottles will look like once they arrive at your home.
Diffuser bottles are often corked, and some corks can be difficult to remove because they are in there so tight, while others are hard to remove because they are broken.
If you get a bottle with a cork that’s especially stubborn, you can try one of the following tips:
- Run the bottle under hot water for about 30 seconds; you don’t want to get the cork itself wet, so hold the bottle at an angle
- Place a long screw into the cork and use a screwdriver to drill it into the cork; once there is only about an inch of the screw showing, you should be able to take a hammer and remove it using the backside of the hammer
- Wrap the bottom of the bottle with a towel and bang it on something hard, such as a countertop or even a tree; the more you pound, the looser the cork will get, and it will eventually pop right out
- Take a sharp, non-serrated knife and put it into the cork about an inch in; turn the knife around until it starts to remove the cork; this tip works better if you place the knife near the edge of the cork and not directly in the middle
- Try the “shoe” method, which is similar to banging the bottle on something hard except that, instead of just wrapping the bottom of the bottle with a towel before you start hitting, place the bottle on the inside of a hard-heeled dress shoe first and bang the shoe against a hard surface
With the “banging” methods, you have to be extra careful because you can easily break the bottle if you’re too rough or aggressive, which is naturally something you don’t want. In fact, many people consider these methods last-resort options, to be used only when other methods don’t work.
Also, if you use the knife method, you should keep in mind that you’re not unscrewing the cork, you are simply turning it. Picture how you would turn a door knob and it’s easy to understand what to do with the knife. You’re just turning the knife around and around, you’re not trying to unscrew anything.
Why Is it So Important to Remove the Cork Properly?
If you’re making your own reed diffuser system, you’ll likely be using it for a long time, which means you’ll want to keep the bottle as long as possible.
If you can’t get the cork out or it breaks apart as you’re trying to remove it, you won’t be able to close the bottle should you ever need to close it again before temporarily storing it somewhere.
Let’s say you’re planning to move to another city or state and you want to take your diffuser bottles with you. If there’s still a little bit of oil left in the bottles and you’ve got the cork out successfully, you can simply plug the cork back in and store the bottles somewhere before you get to your new home.
Indeed, there are numerous reasons why you may need to close your diffuser bottles once again, and this is one of the reasons why making sure you open the bottle properly, in the beginning is so important. Of course, if you choose a bottle with a screw-on top, the task becomes a lot easier every time.
What to Look for in a Diffuser Bottle?
Whether your bottle can close or not, there are certain types of bottles that work best when you’re planning to use them as a reed diffuser.
For one thing, you should never choose an exceptionally lightweight bottle but instead, choose one that is a little on the heavy side.
This is because even though reeds aren’t that heavy, the bottle might still tip over if the bottle is too lightweight.
Another aspect to consider is the color of the bottle. In theory, you can use any color bottle as a reed diffuser; however, if you’re planning to use 100% essential oils to scent the air, you need a dark bottle such as blue, amber, or purple. Real essential oils aren’t supposed to be in direct contact with any light, so they should only be placed in dark bottles when used in a diffuser.
Finally, you want a bottle that has a thick, firm base. Again, you don’t want the bottle tipping over at any point, and a good thick base will prevent that from happening.
It doesn’t have to be anything fancy, or anything too thick and heavy, but you have to make sure it is sturdy enough to handle having reeds being placed in it every day of the year.
Conclusion
Reed diffusers are great additions to any home or office, and if you choose to make them yourself, they are much easier than you think. If you choose a bottle that opens and closes, it can make moving or temporarily storing your diffuser a lot easier, even if the bottle is closed with a cork.
To make the set yourself all you need are a bottle, the reeds themselves, and some type of fragrance or essential oil, all of which you can usually get at a crafts store.
The best reeds are usually the ones made out of rattan, because they soak up the oils more thoroughly and, therefore, provide a great aroma throughout the room.
They can also be used in offices and other commercial locations, and best of all, it is usually inexpensive to make these diffusers yourself.